Pages

Thursday, April 28, 2011

LOVE letter blocks

I am posting this tonight because my husband is taking the computer to work with him in the morning. Cross your fingers and toes that he will be able to restore all of my precious photos!

Today we will be making letter blocks.

You will need:
2x4's
paint (two colors or more)
letter stencil
Mod Podge

First cut your blocks to the size you want.
Paint your main color on all sides (you don't have to do the bottom)

I printed out a font I liked from the computer, but if you have vinyl cutter that would be great too! Paint your letters on in the second color. You can have a second word/saying on the back.
Coat with Mod Podge.
Decorate! Mine are in the kitchen above the cabinets!
I love letter blocks because they can be made for tons of different things.
Holiday words: joy, noel, Santa, Christ, peace, candy, Easter, eggs, bunny, love, valentine, heart, ghost, goblin, witch, trick or treat, give thanks, etc.
Seasonal words: Spring, Autumn, Winter, Summer, splash, flower, leaves, snow, flakes, ice, popsicle, etc.
Family words: child(s) name, love, hope, live, laugh, friends, family, faith, etc.

Wednesday, April 27, 2011

Bed blocks

Hello friends!

Today, I am having my handy husband tell us how he made bed blocks. When we first got married we wanted to buy bed blocks, but they only come in packs of 4 and we needed 5 for our queen sized bed. So, David made us some bed blocks! Now we can fit a couple of tupperware containers under our bed to help us organize our apartment.

These are made of 2x4's and plywood. Both can be found in a dumpster where they are building a house.

Cut the 2x4 into squares. Stack two blocks on top of each other. Screw them together. Cut the plywood into a strip that is a 1/2 an inch taller than your stacked 2x4's. Cut two sides that are the width of your blocks and the other two sides the width of your blocks plus two times the thickness of the plywood. Screw them on.

(top view)
(side & bottom view)

Thank you David!
I hope that you have all found this useful and will be able to organize a little bit better!

Tuesday, April 26, 2011

Handmade washcloth

Today we will be crocheting a washcloth!
My brother-in-law made me one for Christmas one year and it has been my favorite washcloth.

You will need:
yarn
crochet hook
scissors

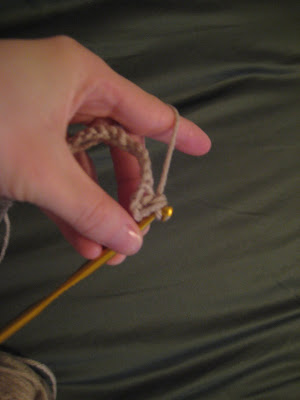
1. First make a slip knot around your hook.
2. You will start crocheting by pulling the yarn through the loop on your hook.

3. Chain 25-30
4. Wrap the yarn around your hook.
5. Count over three stitches and (for this row only) put your hook into the 4th stitch.
6. Wrap your yarn around the hook again.
7. Pull it through two loops on your hook.
8. Wrap another strand of yarn around your hook.
9. And pull it through the last two remaining loops on your hook.
10. Continue this until you have reached the end of your chain.
11. Crochet three
12. Wrap your yarn around your hook...count three (the ones you just chained), skip one stitch and place you hook into the second stitch (putting two loops onto the hook).

Repeat steps 5-12
Crochet about 13 rows or until you have square shape.
All most done!
Cut the yarn and pull it through like you were still crocheting. Pull it tight.
Cut off the extra yarn or weave it into your washcloth.
Here is the new washcloth and the one that my brother-in-law made me. You can see how it gets tighter after you wash it.
If you have any questions on my directions, email me at doodlesanddoilies@gmail.com.

Swimming


Today's date night idea is ...swimming. My husband and I both love to swim; of course he is a lot better at it than I am. So this week when you are planning date night dig out your cute swim suit and head for the pool. If you have a pool at home and the weather is nice watch Jaws while floating out in the pool! If you want go out for ice cream afterwards. Have fun!

Monday, April 25, 2011

Puzzle piece picture frame tutorial

We will be making a picture frame decorated in puzzle pieces.
This project is fun to do with older children as well.


You will need:
a puzzle
cardboard (one thick and one thin)
scissors
ruler
pencil
hot glue gun & glue sticks

First cut out a 6 by 8 (for a 4 by 6 picture) piece of hard card board (I used a diaper box).
Trace your picture on.
Cut out the center of your cardboard. Be sure to leave extra cardboard on so your picture doesn't fall out.
Put your picture behind the cardboard...is it framed nicely?
Glue THREE sides of your thin cardboard onto the back. I used a Wheat Thins box.

Pick out your puzzle pieces.
I picked colors that were bright and had fun designs.
Glue your first layer on. Let them hang over the edge of your frame.
Glue on more pieces covering all of the cardboard. I angled my pieces so some of them weren't flat.
Slide your picture into the frame. And you are all done!
Decorate a room with it on a shelf
OR on a wall


Thursday, April 21, 2011

Graduation

I know you were all looking forward to the puzzle picture frame tutorial today. However, I will be attending my husband's graduation! So, I will start next week off with the puzzle picture frame.

Have a great weekend and Happy Easter!

Wednesday, April 20, 2011

Easter bunny footprints!

Easter is almost here! Can you feel the excitement?!

I want to share with you a fun Easter tradition. When my siblings and I woke up on Easter morning the first thing we did was run to the front door. We would open the door and find...
...that the Easter bunny CAME! He always left his footprints on our front porch.

I made the footprints on my table (because the Easter bunny hasn't come yet).

To get started you will need: a paper, pen, scissors & flour
Draw your foot.
Cut it out.
Sprinkle your flour on top. Pick up the paper carefully. Discard the flour. Flip your paper over to do the other foot & repeat.
I did two different feet to show you some different options. Lots of flour for a solid foot or light flour for a dusted look. Pick your favorite! Clean around the feet
And you are finished.
I hope the Easter bunny stops by your home this Easter!

Picture magnet tutorial

I got this great idea from my sister-in-law.

You will need a cutting tool, glue, "junk" magnet(s) & a favorite picture.
I save the magnets that come with phone books.
Cut your picture down to the size you want it.
Glue your magnets to your picture.
Place picture magnet on the refrigerator or freezer!
Related Posts Plugin for WordPress, Blogger...